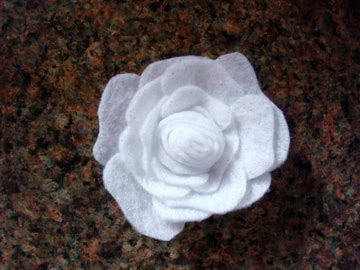
This post has LOTS of pictures, but they are pretty!! This is a tutorial on how to make and dye felt roses to be used for whatever you want! I am using them on the covers of some journals I am going to be selling. I needed some shades of flowers that I don't have in my felt stash and I am kind of on a craft-spending freeze right now, so I had to be creative with what I have.
I found this patten at The Purl Bee and printed it, cut it out and cut out my felt. I used her template for the smaller size roses. After I did the first few, I didn't need the pattern anymore and just eyeballed similar shapes for the larger roses.
You can assemble the flower just like she has in her {rose barrette template} the directions are pretty easy to follow. I just didn't attach them to a barrette. I'll put simple instructions up, though, since I took pictures :)
Roll it up & secure with needle & thread. Add the smaller petals, secure with stitches.
It will look like this:
So pretty! Add the larger petals & stitch.
This is what the back looks like all done:
Now, get out your fabric dye, watercolors, markers or food dye or whatever you have on hand to dye the felt! I was even thinking that I would pick up some egg dying kits, since they are all 75% off right now!
It seemed like the color went on & flowed better if the flowers were wet first.
Then I just added some color to the tips & set it upside down (so the color wouldn't run)
on paper towels (to soak up extra dye) in a glass pan (so it wouldn't dye my countertops)!
That was with bright yellow felt and pink dye. Here's some pictures with white felt:
Dipped the bottom only in yellow.
Pretty! This one, I did the bottom in yellow and the top in pink!
I let them dry overnight, upside down.
Today, they were all dry so I attached them to the journals.
This is one of my favorites!
The kids wanted to make some so we used a hot glue gun, markers and a spray bottle. The turned out cute, but didn't lay as flat with the glue. They did dry a lot faster, since we just spitzed them with febreeze to get the colors to run & to smell good.
~~~~~~~~~~~~~~~~~~~~~~~~~~~~~~~~~~~~~~~~~~~~~~~~~~~~~~
In other news, I have all of my craft room painted except one wall, I am going to do that today. We are waiting on the rest of the wallpaper to arrive (tomorrow) to finish up the ceiling.
The paint color is the same color I have in the living room, it's going to be a bright & cheery space. I can't WAIT until I move all my things back in & start creating for the upcoming show I am doing. Hopefully this week and this weekend we can be pretty productive up there & start moving things back into place soon...
Hope you have a great Wednesday!


5 comments:
Lovely. I just learned to make these roses with paper, but I'd love to try dying felt soon. Thanks for the tutorial. :)
Found you through Creations by Kara! :)
soooooo pretty! What I good idea to use food coloring...would have never thought of that! :) Thanks for sharing!
These are gorgeous! I love making fabric flowers, so I will definitely be giving these a try. Thanks for linking up. :)
Great! I will try..
Beautiful! I love the shades of colors you used. I had to pin it on the Flower Bliss Board on Pinterest and link back to you.
Post a Comment